 | |
| Part 7 - Coming all together | |
|
Finally the end of "part 2" of my plan was almost there, everything was working as it had to. By working on it just a little time every now and then plus all the problems ( bugs ) I had took quite long time to have all this functional. Lot of software was yet necessary, so far all this was still quite a nice piece of HW but missing quite some stuff to make it really useful. One of the first things I've done that I used during all time was the "bootloader" of course that would deserve a full story by its own, in its last incarnation it allows to upload files from a PC using the XMODEM protocol and saves them on a "disk boot partition". I can have up to 16 different boot images. During all this time, until I had CP/M working, I was cross assembling on a PC using TASM Z80 assembler and uploading the image ( binary assembler ) on it, again I started with various "small building blocks tested one by one" that allowed me to create the big picture of a gigsaw. I am definitely for the "bottom up" developement strategy. |
1 2 3 4 5 6 7 |

|
|
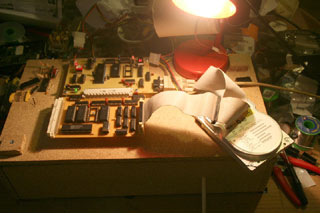
| The system with the HD connected | |
|
Even if it is a small system the amount of stuff I learnt ( and sworn at ) while doing it been really big, there are quite a number of "practical issues" that you'll discover them out when you'll build such a thing for real I mean some stuff you can't 100% predict it "by theory" it comes out "on the field". All this started as a matter of a bit of nostalgia and love and as a dream that still was waiting to become a reality, for me this will always be "a work of love" that I had to do. |
|

|
|
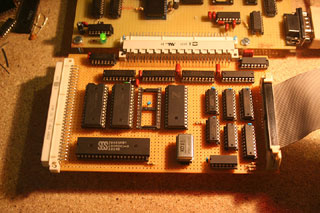
| RAM,RAM,SIO,CTC,CAN,IDE,buffers on top, I/O and logic | |
|
Not even one single gate/chip of all this been wasted, everything been used "to the max", later I even added sharing two bits for two different uses an I2C bus using two transistors, the green LED tells which bank of ROM/RAM is selected, the red top-left is the power LED, the top-right is the HALT led and later for debug I also added a small one that shows the /INT line. So far the I2C bus been used to control a hacked display I found somewhere that was displaying some short messages and the block number being loaded by the bootloader, useful to debug the XMODEM loader. So as I said the other part 3 of the adventure been implementing CP/M on it. For it, I used the remaining two sockets left for .. something a bit unexpected/unplanned. I have now an 8K rom that contains the boot loader itself but a real BIOS ROM that contains all the FAT32 Filesystem/IDE/initalisation/etc. subroutines that I developed all along this time. The last socket been used to fit an extra 8K RAM I had and its purpose is as "disk cache" to cache sectors and other stuff used by the BIOS. |
|

|
|
| First FAT32 directory listing | |
|
Here just above you can see one of my very first tests in understanding how the FAT32 file system works. My BIOS fits well in 8K ( I have quite some space left yet ) and it's amazing what you can do with 8K of pure ASM ;) With that BIOS and all the work and testing done before it literally took me 2 days to have a rudimental CP/M semi-running. So in conclusion what gave me all this Z80 adventure ? Well .. 4 more friends and that already I could say "it's worth all", lot more confidence and understanding of thigs, lot of swearing and lot of fun, lot of 'DOH and slaps on the forehead, the realisation that "1 hour in the morning is worth 20 hours at very late night" and quite some other things. And finally of course a very big feeling of satisfaction, accomplishment and relief :) After 20 years or so I was saying myself "one day I will" now it's HERE ! It's ALIVE ! |
|
| Prev Back to Main | |
| page 7-7 | |